 Save
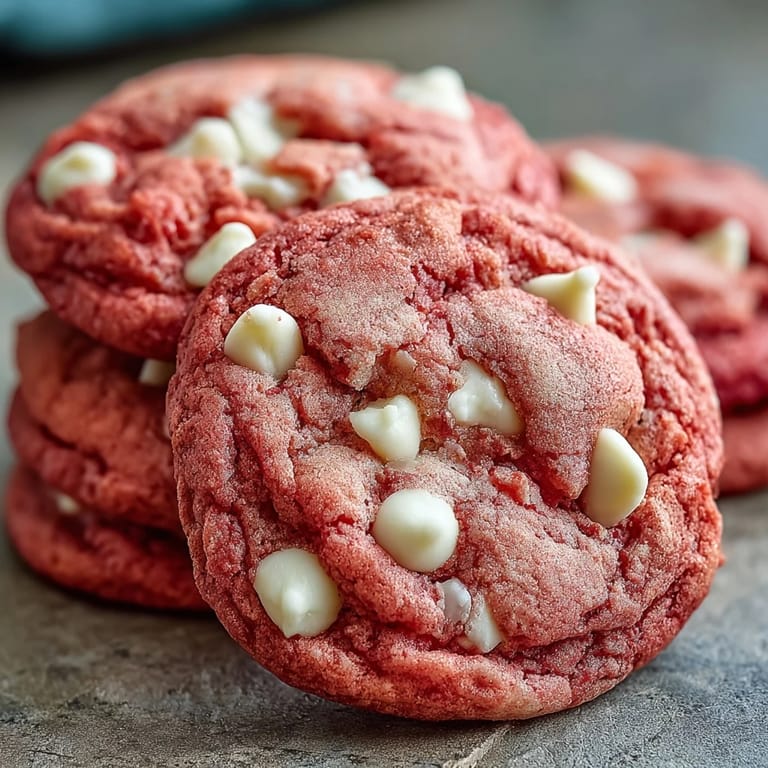
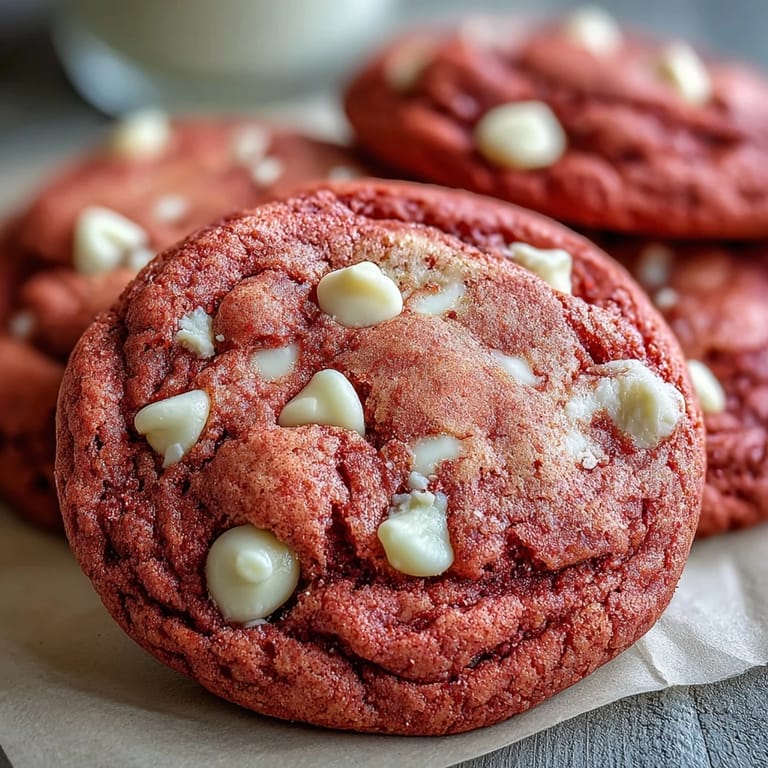
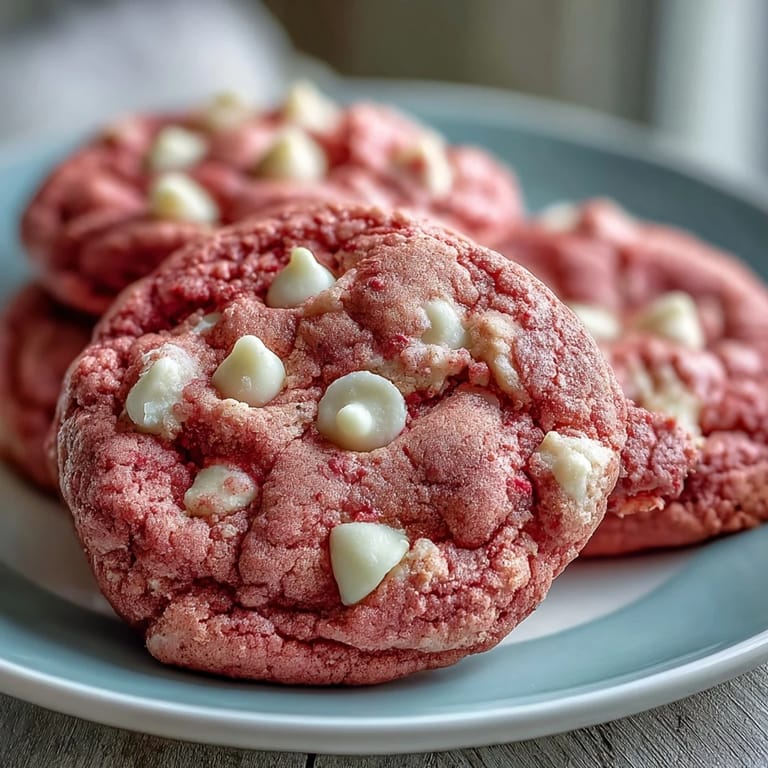
Save The kitchen smelled like butter and vanilla when I realized I'd added way too much pink coloring to the first batch. My daughter peeked over the counter and said they looked like fairy cookies, so I stopped worrying and leaned into it. Now, every time I make these, I think of her little face lighting up at something I thought was a mistake. These soft, pillowy cookies with their cheerful color and white chocolate sweetness have become our go-to for birthdays, bake sales, and random Tuesday afternoons when we need something bright.
I brought a tin of these to a potluck once, and three people asked if I used a boxed mix because they couldnt believe homemade cookies could be this soft. One friend admitted she ate four standing in the kitchen before the party even started. That was the day I learned that sometimes the simplest recipes, the ones that dont try too hard, are the ones people remember and ask you to make again.
Ingredients
- All-purpose flour: This is your base, and using the spoon-and-level method instead of scooping directly keeps the cookies tender instead of dense.
- Baking powder and baking soda: The combo gives you that perfect chewy-soft texture with just a little lift, not cakey, not flat.
- Unsalted butter, softened: Let it sit on the counter for about an hour so it creams easily, if its too cold, the dough wont come together smoothly.
- Granulated sugar: This sweetens and helps create those slightly crackled edges that make each cookie look bakery-worthy.
- Egg: One large egg binds everything and adds moisture, make sure its at room temperature so it blends in without clumping.
- Vanilla extract: Use the real stuff if you can, it makes a noticeable difference in flavor when the recipe is this simple.
- Pink gel food coloring: Gel is key here because liquid coloring can throw off the dough consistency, start with less and add more until you love the shade.
- White chocolate chips: They melt just a little during baking and create pockets of creamy sweetness that contrast beautifully with the soft cookie.
Tired of Takeout? 🥡
Get 10 meals you can make faster than delivery arrives. Seriously.
One email. No spam. Unsubscribe anytime.
Instructions
- Mix the dry ingredients:
- Whisk together the flour, baking powder, baking soda, and salt in a medium bowl until evenly combined. Set it aside while you work on the wet ingredients.
- Cream the butter and sugar:
- Beat the softened butter and sugar together with a mixer on medium speed for about 2 to 3 minutes until the mixture looks pale and fluffy. This step adds air and makes the cookies tender.
- Add the egg, vanilla, and coloring:
- Beat in the egg and vanilla until smooth, then add the pink gel food coloring. Mix until the color is even and vibrant, scraping down the sides of the bowl as needed.
- Combine wet and dry:
- Gradually add the dry ingredients to the wet mixture on low speed, mixing just until no streaks of flour remain. Overmixing at this stage can make the cookies tough.
- Fold in the chocolate chips:
- Use a spatula to gently fold in the white chocolate chips, making sure theyre evenly distributed throughout the dough.
- Chill the dough:
- Cover the bowl with plastic wrap and refrigerate for 30 minutes. This helps the cookies hold their shape and prevents them from spreading too much in the oven.
- Preheat and prep:
- While the dough chills, preheat your oven to 350 degrees Fahrenheit and line two baking sheets with parchment paper.
- Scoop and space:
- Use a tablespoon or cookie scoop to portion the dough into balls and place them about 2 inches apart on the prepared sheets. They will spread a bit as they bake.
- Bake:
- Bake for 10 to 12 minutes, just until the edges are set but the centers still look slightly soft and underbaked. They will firm up as they cool and stay wonderfully chewy.
- Cool:
- Let the cookies rest on the baking sheets for 5 minutes to set, then transfer them to a wire rack to cool completely.
 Save
Save One evening, I made a double batch and packed half into a box for my neighbor who had just had a baby. She texted me later that night saying the cookies were the first thing that made her smile all week. It reminded me that baking is never just about the food, its about the moment you create when you share something made with your own hands.
How to Store and Keep Them Fresh
I store these in an airtight container with a piece of bread tucked inside, which sounds weird but keeps them soft for up to a week. If you want to freeze them, let them cool completely, then layer them between parchment paper in a freezer-safe container. They thaw in about 20 minutes on the counter and taste just as good as the day you baked them.
Ways to Make Them Your Own
Sometimes I add a half teaspoon of almond extract along with the vanilla for a subtle floral note that pairs beautifully with the white chocolate. A friend of mine swaps the white chocolate for dark chocolate chips and skips the pink coloring for a more classic look. You can also press a few extra white chocolate chips on top of each dough ball right before baking to make them look extra bakery-style.
Troubleshooting and Final Thoughts
If your cookies spread too thin, your butter was probably too warm or you skipped the chill time, pop the dough back in the fridge for another 15 minutes and try again. If they come out too cakey, you may have added too much flour, so make sure youre measuring correctly by spooning it into the cup and leveling it off. The beauty of this recipe is that once you get the hang of it, you can make it with your eyes closed and it will turn out perfectly every time.
- Use gel food coloring, not liquid, to avoid changing the dough texture.
- Let your butter and egg come to room temperature before mixing for the smoothest dough.
- Press a few extra chocolate chips on top right before baking for a picture-perfect finish.
 Save
Save These cookies have a way of making ordinary days feel a little more special. I hope they bring as much joy to your kitchen as they have to mine.
Recipe Questions & Answers
- → What gives pink velvet cookies their color?
Pink gel food coloring creates the vibrant hue. Gel coloring is preferred over liquid because it provides more intense color without adding excess moisture to your dough, which could affect the texture and spread of your baked treats.
- → Can I freeze the dough for later?
Absolutely. Scoop the chilled dough into balls, place on a baking sheet to freeze until solid, then transfer to a freezer bag. They'll keep for up to 3 months. Bake from frozen, adding 1-2 extra minutes to the baking time.
- → Why is chilling the dough important?
Chilling for 30 minutes prevents excessive spreading in the oven, resulting in thicker, softer centers and beautifully rounded edges. It also allows flavors to meld and enhances the final texture, making each bite perfectly chewy.
- → What's the difference between pink and red velvet?
Both share similar ingredients and methods, but pink velvet typically omits the cocoa powder found in traditional red velvet. This creates a sweeter, vanilla-forward flavor profile with a lighter color perfect for those who prefer a more subtle taste.
- → Can I use liquid food coloring instead of gel?
You can, but you'll need significantly more to achieve the same vibrant pink shade. This extra liquid may alter your dough consistency. If using liquid, reduce another liquid ingredient slightly or add a tablespoon of flour to compensate.
- → How do I know when they're done baking?
The edges should look set and slightly golden while the centers appear soft and slightly underbaked. They'll continue cooking on the hot baking sheet, so removing them while the center still looks undone ensures perfectly chewy results after cooling.