 Save
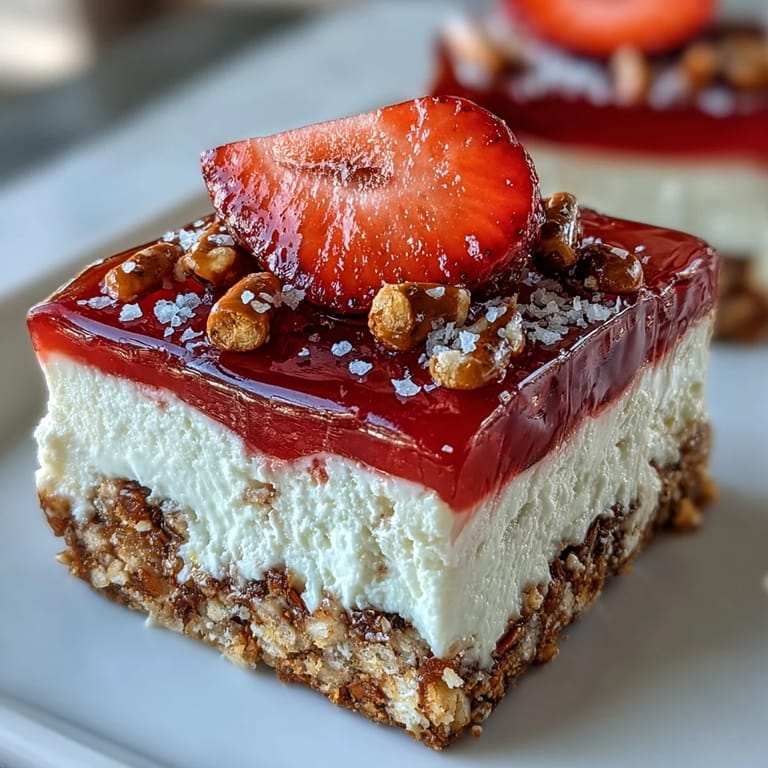
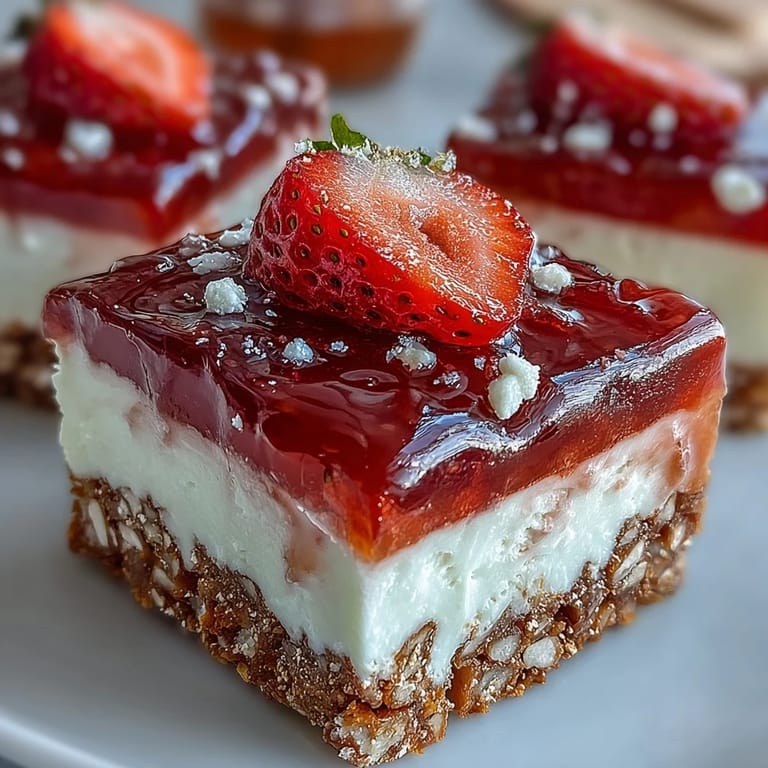
Save Crunching into a Strawberry Pretzel Salad Bar always reminds me of that playful crackle sound you get when cutting through the pretzel crust, a sign good things are coming. My first attempt at these bars wasn’t for a family tradition or holiday—just a sweltering Friday when I wanted something cold and cheerful layered in the fridge. I remember tasting the tang, then the buttery saltiness, and being surprised by how well it worked with the fresh strawberries. Sometimes, recipes can feel like their own sweet inside joke, and this one still makes me smile when I see all the ruby slices on top. The ritual of creating the three layers—crunchy, creamy, and sparkling strawberry—makes for a simple kind of kitchen magic.
I once brought a pan of these bars to a neighborhood picnic under the string lights, where someone immediately asked what made the crust so addictive—I barely had time to set them down before the plate emptied. I still remember laughing as we fought over the last corner piece, wishing I had doubled the batch. The way these bars become a conversation starter might be my favorite part of sharing them. Even my most dessert-skeptical friend admitted defeat after just one spoonful. That’s the kind of kitchen win you don’t forget.
Ingredients
- Salted pretzels, crushed: The base of the bars needs that signature salty snap, and I've found using a zip bag and rolling pin works best to keep some chunky texture.
- Unsalted butter, melted: Melted butter holds the crumbs together; don't scrimp or your crust will crumble as you slice.
- Granulated sugar: Sugar in the crust and the filling balances out the saltiness perfectly—if you love a little extra crunch, sprinkle some on top before baking the base.
- Cream cheese, softened: Room temperature cream cheese mixes lump-free into a lush, creamy middle layer my tasters adore.
- Whipped topping, thawed: This sneaky shortcut gives the filling its classic fluff—just gently fold, don’t stir too hard.
- Strawberry-flavored gelatin: Jiggly, nostalgic, and bold in color, this locks in the berries while crowning every bar with a sunset red finish.
- Fresh strawberries, hulled and sliced: Slice the berries evenly for a mosaic effect; buying ripe ones makes all the difference.
- Boiling water: Pouring water that’s truly boiling over the gelatin is crucial for a smooth, uniform set—lukewarm just won’t do.
Tired of Takeout? 🥡
Get 10 meals you can make faster than delivery arrives. Seriously.
One email. No spam. Unsubscribe anytime.
Instructions
- Start with the pretzel layer:
- Crush pretzels until they’re mostly coarse crumbs, then mix with melted butter and sugar until glossy and sticky to the touch.
- Press and bake:
- Tip the mixture into a greased baking dish and press down firmly, making sure you get into every corner; bake at 350°F until the kitchen smells toasted and sweet, about 10 minutes.
- Cool it down:
- Let the crust cool completely before you touch it with any filling—impatience is the enemy of firm bars.
- Make the creamy middle:
- Beat cream cheese with sugar in a bowl until totally smooth, then fold in whipped topping for that fluffy lift, but don’t overwork it or it’ll deflate.
- Spread and seal:
- Spread the cream cheese mixture evenly over the cooled crust, getting right to the edges so the strawberry layer won’t sneak underneath.
- Chill the layered base:
- Slip the pan in the fridge for at least 30 minutes to help everything firm up for the big finish.
- Prep the strawberry topping:
- Dissolve the gelatin in boiling water, stirring patiently until crystal clear, then let it cool just to room temperature (rushing this can melt the filling).
- Arrange the berries:
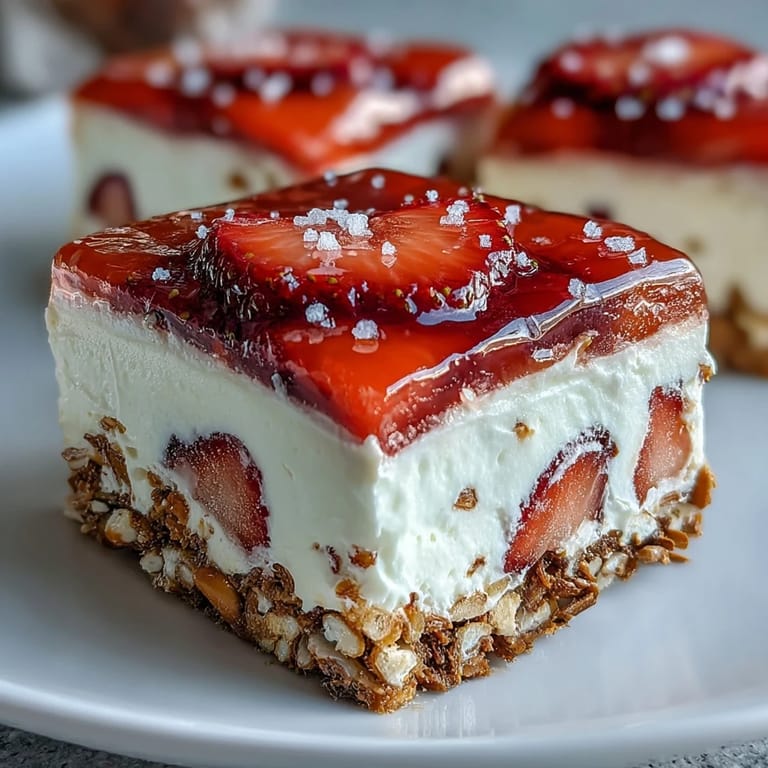
- Create a layer of berries over the creamy filling, nestling slices close together for full coverage.
- Pour the gelatin:
- Carefully pour the cooled gelatin over the berries, letting it sink gently between the fruit.
- Chill to set:
- Refrigerate the pan for at least 2 hours—this is when the magic happens, as the gelatin sets and all the layers hug together.
- Slice and serve:
- Use a sharp knife for clean bars, wiping between cuts; serve cold for the best texture and flavor pop.
 Save
Save  Save
Save I still remember my cousin’s surprise birthday—she’d sworn off most desserts, but these bars converted her after one slice. The laughter and the choruses of wow, what is this made every meticulous layer worth it—it felt like giving a gift with every chilled square.
Best Ways to Customize for the Season
Summer is made for strawberries, but when autumn rolls around, you can swap them for blueberries, blackberries, or even a tumble of mixed berries. There’s something fantastic about a dessert that bends with the fresh produce at the market—if your local stand has fragrant raspberries, give them a try. In spring, adding a hint of lemon zest brightens everything up. I once even tried sliced peaches and the sweet-salty hit was impossible to resist. The recipe’s real secret is how flexible it is for whatever fruit or mood you have at hand.
Tips for Cutting Clean, Even Bars
One trick I swear by: chill the finished pan for the full two hours, or a touch longer if you have the patience. Use a large sharp knife warmed under hot water and wiped dry for each slice—it gives you those bakery-worthy edges. Make a straight down cut instead of a sawing motion; the layers won’t drag or smudge this way. Sometimes the first slice is sacrificial, so I just eat it immediately—chef’s treat. Clean bars really are a happy payoff for a little extra care.
Making It Ahead: What to Know
This dessert shines as a make-ahead hero, holding up overnight in the fridge without losing its crunch if you seal it tightly. If you need to stack the bars, nestle pieces of parchment between them to keep the layers neat. When moving from fridge to table, I like to garnish with a few extra strawberry slices on top for an inviting touch.
- Letting the gelatin cool to room temp (not warm) protects the creamy layer.
- Bars stay fresh for up to three days in the fridge, but rarely last that long.
- Always reserve a piece for yourself before serving—it disappears quickly!
 Save
Save 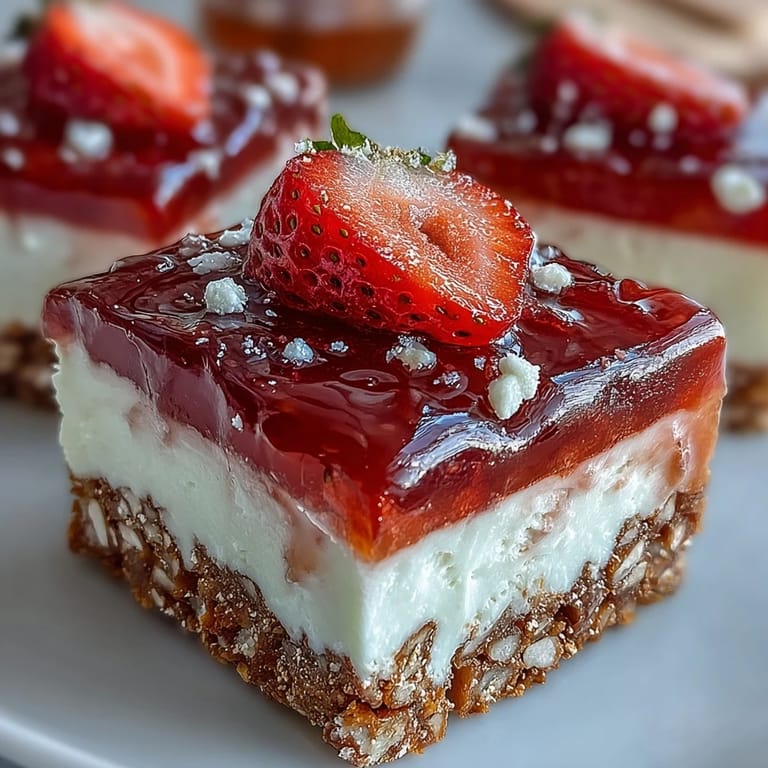 Save
Save Whether you’re sharing these bars with a crowd or sneaking a slice with coffee, the sweet and salty bite feels like pure summer on a plate. Here’s to desserts that spark conversations and never fail to bring people together.
Recipe Questions & Answers
- → Can I make the pretzel crust gluten-free?
Yes. Swap regular salted pretzels for a certified gluten-free variety and follow the same proportions and baking time to achieve the same crunchy base.
- → How do I prevent the gelatin from seeping through the cream layer?
Seal the edges of the cream cheese layer by spreading it fully to the pan edges and chilling it until firm; this creates a barrier so the cooled gelatin stays on top of the fruit.
- → What’s the best way to slice neat bars?
Chill the pan until the gelatin is fully set, then run a sharp knife under hot water, dry it, and slice in straight motions, wiping the blade between cuts for clean edges.
- → Can I use fresh berries other than strawberries?
Yes. Raspberries or blueberries make great alternatives; choose a complementary gelatin flavor or omit flavored gelatin and use a clear glaze if you prefer a purer fruit taste.
- → How long can these bars be stored?
Keep them refrigerated in an airtight container for up to 3 days for best texture. After that the crust may soften and the fruit can release extra liquid.
- → Any tips to make the cream layer tangier?
Stir in a tablespoon of lemon juice or a touch of sour cream to the cream cheese mixture for a brighter, tangier balance against the sweet gelatin and crust.